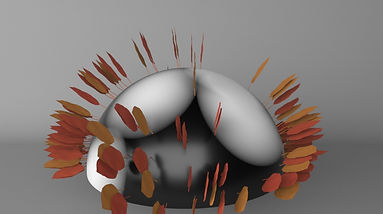
RI - MEL "Growing Tree"
Dynamic Secondary Geometry
March 1st, 2016
Project Overview
This is a project from class VSFX 705 - Programming Concept for VSFX.
The procedural techniques presented in this technical breakdown used Pixar's custom MEL procedures (part of RenderMan Studio) to create secondary geometry at "render-time." The breakdown also explains how a custom interface can be added to Maya to enable the generation of secondary geometry to be controlled in an artist-friendly way.
In this project, my idea is to apply theRiMel scripting into models to generate the leaves by the position of each vertex on the branches. And also, apply RiMel scripting into the ground surface to generate grasses base on the distribution of colors. The software I used is Maya 2016, render engine is RenderMan 20, Using Mari to do the texturing.
Inspiration
I got this inspiration when I searching the image of an online game. The scene original painting is very great and lovely. So I started to think about if I can model this scene.


Final Render Image
All leaves and grasses are all generated at render time. And there are all .rib files.
Tree in Summer

Tree in Autumn

Actual Model in Maya


Animation of Leaves growing
Rib Files For This Scene
Sometimes, when the scene file has too many polygons, we can prepare some rib files to content some repeating models in that scene, and apply "ReadArchive" to open those rib files when we rendering, such as leaves and grasses. As follow is my leaves and grasses rib files with different shaders.


Leaves in summer and autumn


Grasses on the ground
User Interface

* Read File Archive: Select a .rib file you prepared;
* Random Select Files: Check this box if you want to randomly
select your file in that folder;
* Number of Random Files: Input the number of files you want to select;
* Use Color Map: Check this box if you want to use color map
to determine where your rib file be placed;
If this box has no been checked, your rib file
will be placed base on model's vertex;
* Color Map Node Name: If you check the Use Color Map box, input
the name of the node you want to use here;
* Use Marker: Check this box when you want to use a
simple sphere to show the result;
* Align to Normal: Check this box when you want the rib file
align to the normal;
* Object Density: Determine the density of your rib file;
* Object Orientation: Spread out to place your objects
(randomly move and rotate);
* Random Seed: Randomly place your objects;
* Scale Size: Determine the size of your objects;
* Use Random Scale: Check this box if you want your rib file be
randomly scaled;
* Random Scale Min: Determine the min value of random scale;
* Random Scale Max: Determine the max value of random scale;
* Use Random Rotation: Check this box if you want your rib files be
randomly rotated;
* Random Rotate X, Y, Z Min: Determine the min value of random rotate;
* Random Rotate X, Y, Z Max: Determine the max value of random rotate;
Functions of User Interface
Random select files


Use Color Map


Use Markers


Align to Normal


Object Density


Object Orientation


Random Seed


Scale Size


Random Scale


Random Rotation


Functions of User Interface
The Source codes as follow. Please make sure following source code files goes to ../maya/projects/RfM_mel directory.
StuffGenerator.rman
StuffGeneratorRI.mel
StuffGeneratorUI.mel
Please make sure these codes goes to ../maya/scripts directory.
getUVColorsAndPositions.mel
aimY.mel
getVertices.mel
getNurbsData.mel
getNormals.mel
Conclusion
This dynamic secondary geometry tool is very useful. When I first learn modeling in Maya, the scene file size always is my problem because some of my models have too many polygons. Now, I know how to export some of the models into a rib file to keep the original scene file as small as possible. In this project, I also learned Pixar's custom MEL procedures and how to use Mel scripting to control the objects.